Problem - Galaxy
Galaxy is a web-based bioinformatics toolkit that allows users to create customized data analysis pipelines. It is becoming an extremely common tool, especially in the sequencing field. The project has one major flaw: it is difficult to get large data files into the system. Uploading 2G files (generated from sequencing runs) through a browser is not a workable solution.
Solution - iRods
iRods is a virtual file system commonly used to transfer and share files in the scientific community. It abstracts the storage details and provides tools for access control, sharing, metadata tracking, file type conversion, and high performance multi-threaded file transfer.
Integration
Myself and co-workers Fred Bevins and Susan Miller were tasked with integrating iRods and Galaxy during the iRods code sprint hosted by iPlant in April. My share of the work was a client-side Javascript file browser. The file browser allows users to browse and select server side files. The version I built talks to the iPlant Foundational API, which exposes iRods directories and files. Other back-ends could easily be added to allow the file browser to talk with a standard file system, or any other file repository. Fred and Susan worked on integrating the file browser into Galaxy, which allows Galaxy users to browse and select files in an iRods repository for use in an analysis. The javascript code is available now, and the Galaxy integration code should be available sometime soon.
Sunday, May 29, 2011
Monday, April 4, 2011
Using Protovis to Create Simple Flow Charts
Protovis is a Javascript library for creating SVG graphics to visualize datasets. The API is great, and I've been using it to visualize all sorts of data for a project I'm working on. I had a need to display a very simple (< 15 nodes) branching flow chart. The screen is simple enough that it doesn't justify a custom Protovis layout component or anything fancy like that.
I cooked up a scheme where the nodes are absolute positioned div elements that can be styled with CSS, and the edges are drawn with Protovis. I pass an object that defines the edge properties to a Javascript function that uses JQuery to find the exact positions of the nodes, and then I use Protovis to draw the edges.
Example:
 HTML:
HTML:
CSS:
Javascript:
I cooked up a scheme where the nodes are absolute positioned div elements that can be styled with CSS, and the edges are drawn with Protovis. I pass an object that defines the edge properties to a Javascript function that uses JQuery to find the exact positions of the nodes, and then I use Protovis to draw the edges.
Example:

<div id="workflowContainer">
  <!--
    -- Draw Simple divs to represent workflow nodes, and connect them with Protovis.
    --
    -- Nodes are positioned absolutely.
    -- Node positions can be static and manually determined,
    -- or dynamic and determined by server-side or client-side
    -- code. This example uses hard coded node positions.
    -->

  <div id="workflowChart" >

    <!-- Clickable node -->
    <a href=""><div id="startFlow" style="top 0; left: 440px;">Start</div></a>

    <!-- Foo branch -->

    <!-- Unclickable node -->
    <div id="foo1Flow" style="top: 100px; left: 200px;">Foo 1</div>

    <a href=""><div id="foo2Flow"  style="top: 175px; left: 100px;">Foo 2</div></a>

    <div id="fooChoice1Flow"  style="top: 300px; left: 0px;">Foo Choice 1</div>

    <div id="fooChoice2Flow" class="inactive" style="top: 300px; left: 165px;">Foo Choice 2</div>

    <div id="fooChoice3Flow" class="inactive" style="top: 300px; left: 360px;">Foo Choice 3</div>

    <div id="fooOptionFlow"  style="top: 400px; left: 50px;">Foo Option</div>

    <a href=""><div id="fooCombineFlow"  style="top: 500px; left: 200px;">Foo Combine</div></a>

    <a href=""><div id="fooSplit1Flow"  style="top: 575px; left: 25px;">Foo Split 1</div></a>

    <a href=""><div id="fooSplit2Flow"  style="top: 575px; left: 250px;">Foo Split 2</div></a>

    <!-- bar branch -->
    <div id="barFlow" style="top: 100px; left: 700px;">Bar</div>

    <a href=""><div id="bar1Flow" class="inactive" style="top: 200px; left: 550px;">Bar 1</div></a>

    <a href=""><div id="bar2Flow" class="inactive" style="top: 200px; left: 825px;">Bar 2</div></a>
  </div>
</div>
CSS:
/* Contains both nodes and edges. */
#workflowChartContainer {
 position: relative;
 width: 1000px;
}

/* This is where the edges will be drawn by protovis. */
#workflowChartContainer span {
 position: absolute;
 top: 0;
 left: 0;
 background: transparent;
 z-index: 1000; /* SVG needs to be drawn on top of existing layout. */
}

#workflowChart {
 position: relative;
 top: 0;
 left: 0;
 height: 700px;
 width: 1000px;
}

#workflowChart div {
 border-color: #5b9bea;
 background-color: #b9cde5;
 position: absolute;
 margin: 0;
 padding: 4px;
 border: 2px solid #5b9bea;
 background: #b9cde5;
 border-radius: 4px;
 -moz-border-radius: 4px;
 -webkit-border-radius: 4px;
 color: #000;
 z-index: 10000; /* Needs to be drawn on top of SVG to be clickable. */
}

#workflowChart a {
 cursor: pointer;
}

#workflowChart a div {
 border-color: #f89c51;
 background: #fcd5b5;
}

#workflowChart div.inactive {
 border-color: #ccc;
 background-color: #eee;
 color: #ccc;
}

#workflowChart div:hover {
 border-color: #700000;
}
Javascript:
/* Initialize workflow screen. */
var initWorkflow = function() {
    // List HTML nodes to connect.
    //
    // The edges are hardcoded in this example,
    // but could easily be made dynamic.
    var edges = [
        {
            source: 'startFlow',
            target: 'foo1Flow'
        },
        {
            source: 'foo1Flow',
            target: 'foo2Flow'
        },
        {
            source: 'foo2Flow',
            target: 'fooChoice1Flow'
        },
        {
            source: 'foo2Flow',
            target: 'fooChoice2Flow'
        },
        {
            source: 'foo2Flow',
            target: 'fooChoice3Flow'
        },
        {
            source: 'fooChoice1Flow',
            target: 'fooOptionFlow'
        },
        {
            source: 'fooChoice2Flow',
            target: 'fooOptionFlow'
        },
        {
            source: 'fooOptionFlow',
            target: 'fooCombineFlow'
        },
        {
            source: 'fooChoice3Flow',
            target: 'fooCombineFlow'
        },
        {
            source: 'fooCombineFlow',
            target: 'fooSplit1Flow'
        },
        {
            source: 'fooCombineFlow',
            target: 'fooSplit2Flow'
        },
        {
            source: 'startFlow',
            target: 'barFlow'
        },
        {
            source: 'barFlow',
            target: 'bar1Flow'
        },
        {
            source: 'barFlow',
            target: 'bar2Flow'
        },
    ];

    // Us JQUery to set height and width equal to background div.
    var workflow = $('#workflowChart'),
        h = workflow.height(),
        w = workflow.width();

    // Create Protovis Panel used to render SVG.
    var vis = new pv.Panel()
        .width(w)
        .height(h)
        .antialias(false);

    // Attach Panel to dom
    vis.$dom = workflow[0];

    // Render connectors
    drawEdges(vis, edges);
    var test = vis.render();
 };

 /* Draw edges specified in input array. */
 var drawEdges = function(vis, edges) {
     // Direction indicators,
     var directions = [];

     $.each(edges, function(idx, item){
         // Color of edges
         var color = '#000';

         // Arrow radius
         var r = 5;

         // Use JQuery to get source and destination elements
         var source = $('#' + item.source);
         var target = $('#' + item.target);

         if (!(source.length && target.length)) {
             // One of the nodes is not present in the DOM; skip it.
             return;
         }

         var data = edgeCoords(source, target);
         if (item.sourceLOffset) {
             data[0].left += item.sourceLOffset;
         }
         if (item.targetLOffset) {
             data[1].left += item.targetLOffset;
         }

         if (source.hasClass('inactive') || target.hasClass('inactive')) {
             // If target is disabled, change the edge color.
             color = '#ccc';
         }

         // Use Protovis to draw edge line.
         vis.add(pv.Line)
             .data(data)
             .left(function(d) {return d.left;})
             .top(function(d) {
                 if (d.type === 'target') {
                     return d.top - (r * 2);
                 }

                 return d.top;
              })
             .interpolate('linear')
             .segmented(false)
             .strokeStyle(color)
             .lineWidth(2);

         // Here you may want to calculate an angle
         // to twist the direction arrows to make the graph
         // prettier. I've left out the code to keep thing simple.
         var a = 0;

         // Add direction indicators to array.
         var d = data[1];
         directions.push({
             left: d.left,
             top: d.top - (r * 2),
             angle: a,
             color: color
         });
     });

     // Use Protovis to draw all direction indicators
     //
     // Here you may want to check and make
     // sure you're only drawing a single indicator
     // at each position, to avoid drawing multiple
     // indicators for targets that have multiple sources.
     // I've left out the code for simplicity.
     vis.add(pv.Dot)
         .data(directions)
         .left(function (d) {return d.left;})
         .top(function (d) {return d.top;})
         .radius(r)
         .angle(function (d) {return d.angle;})
         .shape("triangle")
         .strokeStyle(function (d) {return d.color;})
         .fillStyle(function (d) {return d.color;});
 };

 /* Returns the bottom-middle offset for a dom element. */
 var bottomMiddle = function(node) {
     var coords = node.position();
     coords.top += node.outerHeight();
     coords.left += node.width() / 2;
     return coords;
 };

 /* Returns the top-middle offset for a dom element. */
 var topMiddle = function(node) {
     var coords = node.position();
     coords.left += node.width() / 2;
     return coords;
 };

 /* Return start/end coordinates for an edge. */
 var edgeCoords = function(source, target) {
     var coords = [bottomMiddle(source), topMiddle(target)];
     coords[0].type = 'source';
     coords[1].type = 'target';
     return coords;
 };
Wednesday, March 16, 2011
PyCon 2011 Report
Here is a presentation covering the status of Python and sessions I attended at PyCon 2011:
Pycon 2011
View more presentations from limscoder
Wednesday, March 9, 2011
SLM Presentation
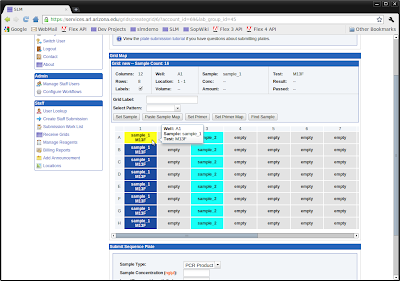
Presentation slides from UAWEBDEV presentation about SLM (Sample Lifecycle Manager).
SLM (Sample Lifecycle Manager)
View more presentations from limscoder
Friday, February 18, 2011
SLM (Sample Lifecycle Manager)
SLM
We released the latest version of SLM (Sample Lifecycle Manager) on February 1st, and the site has been a resounding success so far. SLM supports life sciences laboratory services offered by UAGC including:
- DNA extraction
- Sanger sequencing
- DNA fragment analysis (str/microsatellite)
- Sequenom genotyping
- Sequenom methylation analysis
- Taqman genotyping
- 454 sequencing
- Ion Torrent sequencing (coming soon)
EAGER
SLM is built with Eager, an application framework for developing custom LIMS. Eager is a collection of Django apps that provide common LIMS functionality including:
- Workflow management with GLP compliant status logging
- GLP compliant user and lab access control and management
- Sample/tube/grid submission and management
- Volume and concentration tracking
- Automated sample and reagent dilution and 'cherry picking' transfers
- Reagent lot tracking
- Data management and collaboration
- Integration with SOP management system
- Environmental monitoring
The core features of Eager can be used 'out-of-the-box' for a complete LIMS solution with a generic sample tracking workflow, or can be customized to provide service specific workflows (such as Sequenom, 454, Ion Torrent, etc.) The framework includes tons of features, and additional workflows can be easily added by an experienced Django developer. Custom workflows are simply custom Django apps that hook into Eager's workflow definition system. All client-side code is written with the Dojo framework.
I am hoping to release the Eager framework on GitHub this spring or summer (it will be the first "open-source LIMS that doesn't suck"), but it currently needs to be reviewed by our IP/legal department first.
Sunday, January 2, 2011
Django ORM Tools
Django ORM Tools
The Django ORM is a great tool that makes it easy to work with simple data models, but it quickly shows its limitations as the complexity of the data model grows. The orm_tools module is an attempt to keep the simplicity of the Django ORM, while adding some extra features that make it much easier to work with complex object graphs. The code is available on Django Snippets.
Object Instances/Sessions
The Django ORM loads each object separately from the database. If different QuerySets select multiple objects with the same primary key, the resulting objects will all be different instances.
The SQLAlchemy ORM solves this problem with sessions. orm_tools contains a Session class to provide similar functionality. Use the 'with' statement in combination with a Session instance to force QuerySets to retrieve cached object instances from the session.
When QuerySet objects are executed inside of the 'with' block, all SQL queries are performed normally, but cached object instances are returned if an instance with an identical primary key already exists in the session. The session applies throughout any code called from within the 'with' block. Any objects inserted into the DB within the 'with' block are automatically added to the session.
Object Graphs
The Django ORM does not automatically save model object dependencies, so Django model instances must be saved one at a time.
For simple data models, this problem is easily fixed by inserting the models into the database at the same time that they are created.
However this is not always ideal for more complex data models, especially if the objects involved already exist in the database, and changes need to be persisted by updating existing rows. orm_tools contains a GraphSaver class that will save an entire object graph at once.
When the 'save' method of the GraphSaver object is called, all dependencies will be detected and their 'save' methods will be called in the correct order, so that the entire object graph is saved. The GraphSaver's 'save' method works equally well for both inserts and updates, although updates can optionally be ignored by setting the 'update' argument to False. In the future, I hope to increase performance significantly by modifying the code to exeucte batched insert/update queries for databases that support it (postgres w/ psycopg 2).
Collections
The Django ORM supports one-to-many object relations. Objects on the 'many' side of a one-to-many relation cannot be attached to the 'one' unless the 'one' is already saved in the database. This causes some of the same problems as described in the 'Object Graphs' section. The orm_tools module contains a Collection class that enables 'many' objects to be added to a 'one' object, regardless of whether the 'one' object has been saved yet.
The Collection object can be iterated through, indexed, and sliced regardless of whether the 'one' object and the 'many' objects have been saved yet. The GraphSaver's 'save' method will also automatically save all 'many' objects.
The Django ORM is a great tool that makes it easy to work with simple data models, but it quickly shows its limitations as the complexity of the data model grows. The orm_tools module is an attempt to keep the simplicity of the Django ORM, while adding some extra features that make it much easier to work with complex object graphs. The code is available on Django Snippets.
Object Instances/Sessions
The Django ORM loads each object separately from the database. If different QuerySets select multiple objects with the same primary key, the resulting objects will all be different instances.
>>>MyModel.objects.get(pk=1) is MyModel.objects.get(pk=1)
False
The SQLAlchemy ORM solves this problem with sessions. orm_tools contains a Session class to provide similar functionality. Use the 'with' statement in combination with a Session instance to force QuerySets to retrieve cached object instances from the session.
>>>from orm_tools import Session
>>>with Session():
>>>    MyModel.objects.get(pk=1) is MyModel.objects.get(pk=1)
True
When QuerySet objects are executed inside of the 'with' block, all SQL queries are performed normally, but cached object instances are returned if an instance with an identical primary key already exists in the session. The session applies throughout any code called from within the 'with' block. Any objects inserted into the DB within the 'with' block are automatically added to the session.
Object Graphs
The Django ORM does not automatically save model object dependencies, so Django model instances must be saved one at a time.
>>>parent = MyModel()
>>>child = MyChild(parent=parent)
>>>child.save()
IntegrityError: app_mychild.parent_id may not be NULL
For simple data models, this problem is easily fixed by inserting the models into the database at the same time that they are created.
>>>parent = MyModel.objects.create()
>>>child = MyChild.objects.create(parent=parent)
However this is not always ideal for more complex data models, especially if the objects involved already exist in the database, and changes need to be persisted by updating existing rows. orm_tools contains a GraphSaver class that will save an entire object graph at once.
>>>from orm_tools import GraphSaver
>>>parent = MyModel()
>>>child = MyChild(parent=parent)
>>>saver = GraphSaver()
>>>saver.save(child)
When the 'save' method of the GraphSaver object is called, all dependencies will be detected and their 'save' methods will be called in the correct order, so that the entire object graph is saved. The GraphSaver's 'save' method works equally well for both inserts and updates, although updates can optionally be ignored by setting the 'update' argument to False. In the future, I hope to increase performance significantly by modifying the code to exeucte batched insert/update queries for databases that support it (postgres w/ psycopg 2).
Collections
The Django ORM supports one-to-many object relations. Objects on the 'many' side of a one-to-many relation cannot be attached to the 'one' unless the 'one' is already saved in the database. This causes some of the same problems as described in the 'Object Graphs' section. The orm_tools module contains a Collection class that enables 'many' objects to be added to a 'one' object, regardless of whether the 'one' object has been saved yet.
from django.db import models

from orm_tools import Collection

class One(models.Model):
    label = models.CharField(default='blank', max_length=20)

# Call the 'set_property' static method
# to create a collection object.
#
# Arguments
# ==========
#  * Model to add collection to
#  * Collection attribute name
#  * Many's foreign key attribute name
#  * One's 'many set' attribute name
Collection.set_property(One, 'children', 'parent', 'many_set')

class Many(models.Model):
    label = models.CharField(default='blank', max_length=20)
    parent = models.ForeignKey(One, null=False)
>>>one = One()
>>>one.children.add(Many())
>>>one.children.add(Many())
>>>saver = GraphSaver()
>>>saver.save(one)
The Collection object can be iterated through, indexed, and sliced regardless of whether the 'one' object and the 'many' objects have been saved yet. The GraphSaver's 'save' method will also automatically save all 'many' objects.
Saturday, October 16, 2010
Apache, Virtual Hosts, and HTTPS
Apache cannot use https with name-based virtual hosts due to the way the SSL handshake works. I've run across this problem several times in the past, and I always forget how to solve it. So I'll record it here for posterity.
To get things working, the Apache setup needs to be changed from name-based virtual hosting to ip-based virtual hosting. After configuring a separate ip for each vhost that requires https, the Apache config files (/etc/httpd/conf/ on RHEL, Apache 2.2) need to be updated to use ip-based virtual hosting.
If name-based vhosting was previously configured, it will need to be modified. If all vhosts are being converted to ip-based vhosting, then name-based vhosting can be completely turned off by commenting or deleting any 'NameVirtualHost' directives. However, it is also possible to continue to use name-based vhosting for vhosts that do not require https. Any existing 'NameVirtualHost' directives that contain wildcards ('NameVirtualHost *:80') will need to be modified. Replace the wildcard with the ip that will be shared by name-based vhosts.
Next, modify any existing 'VirtualHost' directives that contain wildcards in their definition ('VirtualHost *:80'). Replace the wildcard with the ip that the vhost will be using. Virtual hosts that do not require HTTPS can continue to use name-based virtual hosting, and can share the same ip, but all vhosts that require HTTPS must use a unique ip address.
Finally, configure a 'VirtualHost' directive for each ip-based vhost in the ssl section of the Apache configuration file ('/etc/httpd/conf.d/ssl.conf' on RHEL, Apache 2.2). Any name-based vhosts will continue to share the ssl config within the '_default_:80' 'VirtualHost' directive. Restart Apache for the changes to take affect.
Subscribe to:
Comments (Atom)